Altiverb is a plug-in that makes your audio sound as if it was played back somewhere else, adding the acoustics of existing spaces to your own recordings or to your live audio. All spaces in Altiverb were recorded in the real world, from Sydney Opera House to a Scottish underground oil tank the size of a cathedral.


Longer than anyone in the industry, and with more ear for detail, Audio Ease has been traveling the world to record the acoustics of the best sounding spaces.
The results of hundreds of these recordings are included with Altiverb 8.
Ranging from London's Wembley stadium to the ancient caves of the island of Malta and the churches, concert halls and rock studios from cities like Tokyo, Paris, Amsterdam, Berlin and New York.

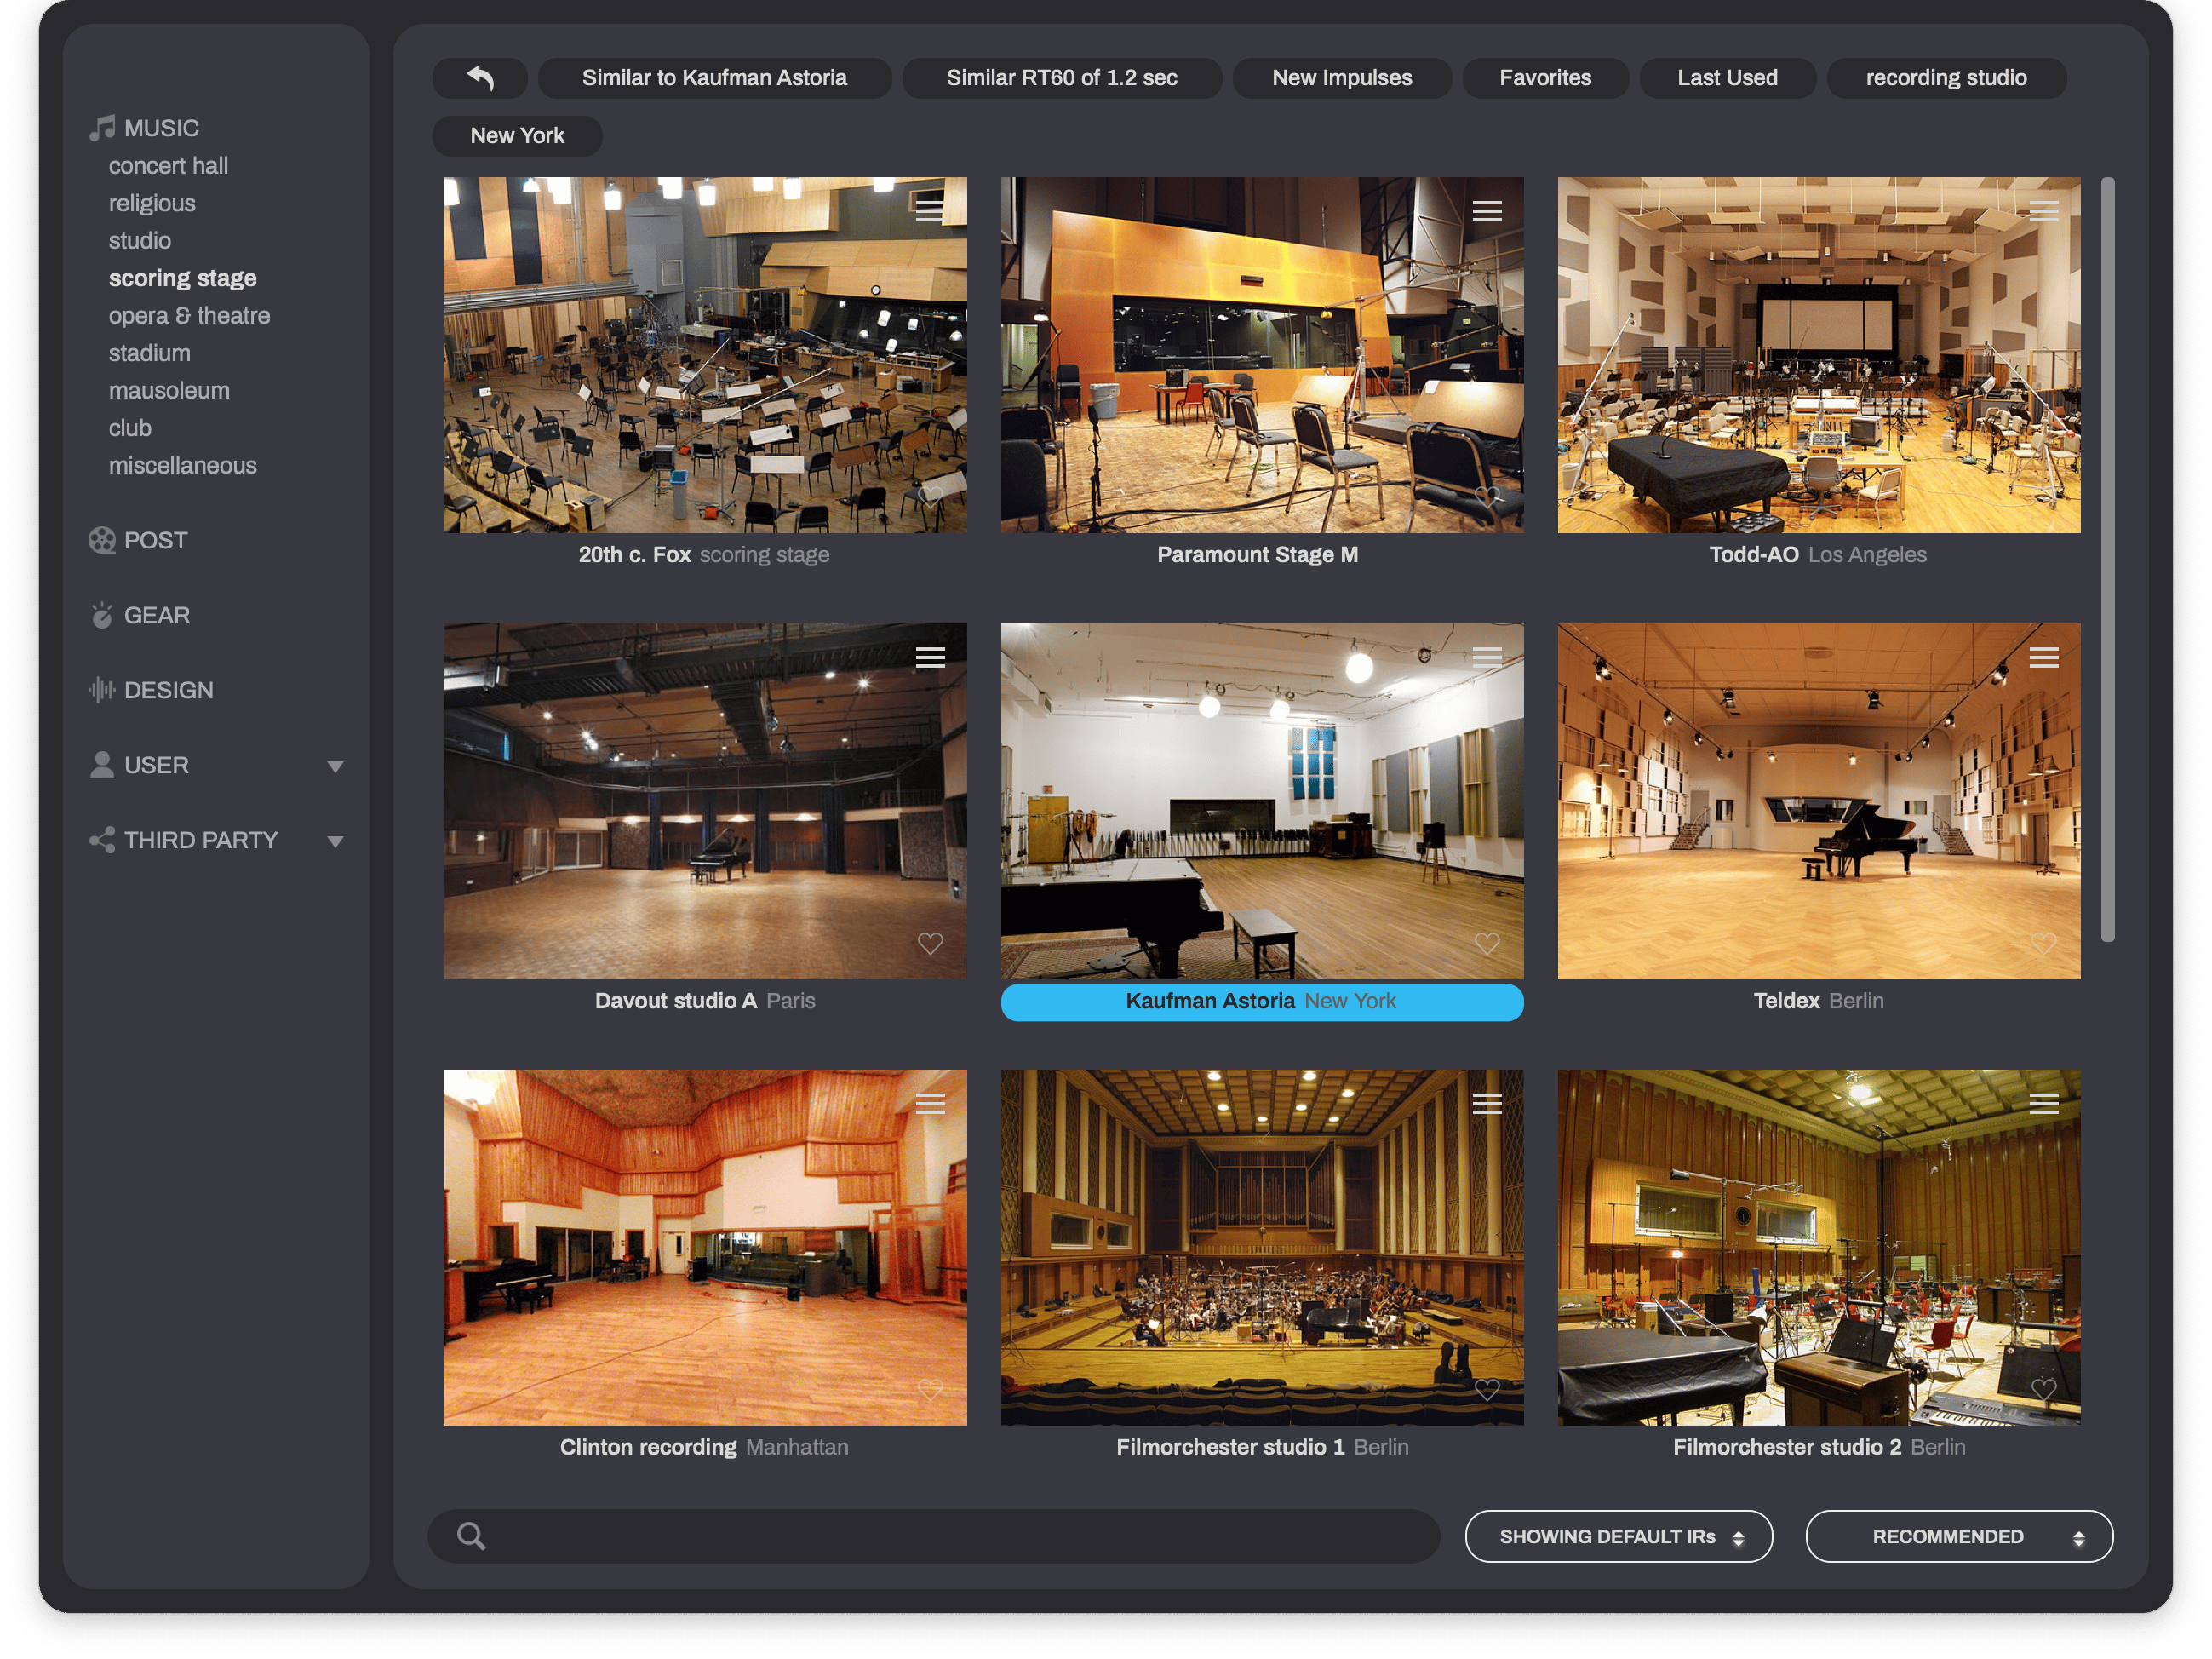
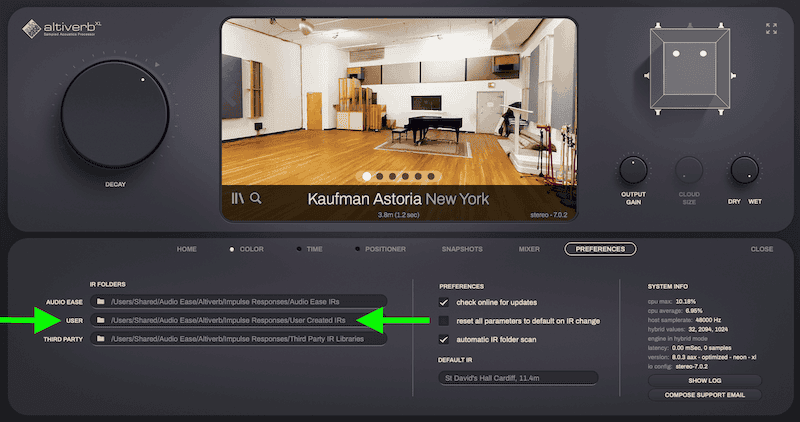
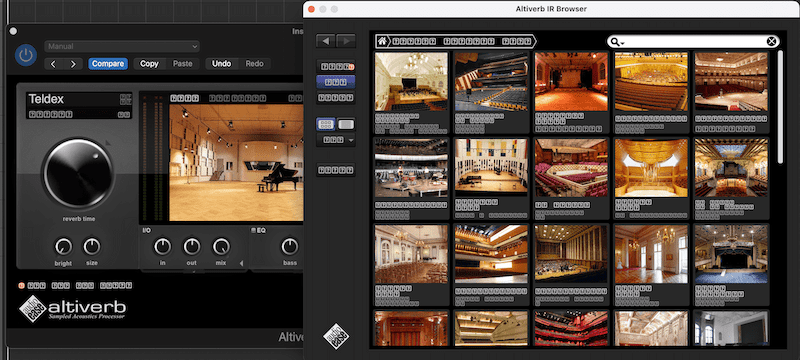
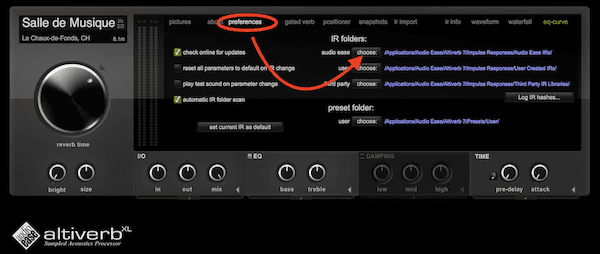
The Impulse Response library is now more accessible then ever because of Altiverb's newly designed browser. Select impulse responses by clicking photos of rooms. Instant, gapless loading, finding similar sounding spaces, organise by reverb length (RT60), and single click favorites are just a few of the possibilities. The Impulse Response Browser and the pictures in it are resizeable and contains an extensive search field.

First class orchestral recording studios from the US East and West coast are featured in Altiverb, like Todd AO, 20th Century Fox, paramount, some of these studios do no longer exist, but their sound lives on in Altiverb.
First class orchestral recording studios from the US East and West coast are featured in Altiverb. Some of these scoring stages are no longer excistence, but their sound lives on in Altiverb.


Many world class recording studio live spaces and echo chambers, from Tokyo to Paris are part of the Altiverb impulse responses library.
The POST category features many different sounding spaces, every day rooms like bathrooms, restrooms, kitchens, different types of transport, trains, cars, planes, but also the not so ordinary, odd sounding, spaces like museums, huge domes or sewer pipes.

Altiverb contains a tremendous amount of classic reverb gear and purpose built echo chambers. You will find all the EMT plates you want, spring reverbs, classic digital gear like the 480, 224, the RMX 16, the 250. Add the Frank Sinatra and Beach Boys echo chambers and you have everything you need to recreate all those classic sounds.
These IR sets match the real hardware units very closely, usually indistinguishable from the original,
as you can compare below, by switching in realtime between:
the Altiverb output recording and
the original recording. Four machines below, more on the IR page

The SP2016 audio examples are recordings of the DRY input track played through the actual SP2016 hardware reverb at the IR recording session by Zach McNees.
The ALTIVERB examples are bounced tracks from a Pro Tools session in which the DRY input sends to an Aux track with the Altiverb 7 plug-in inserted and Altiverb 7 has loaded the IR of the same SP2016 preset.
The guitar example is a snippet from Kiss Landing by Pierre Bensusan

The EMT 250 audio examples are recordings of the DRY input track played through the actual EMT 250 hardware reverb at the IR recording session by Arjen in New York.
The ALTIVERB examples are bounced tracks from a Pro Tools session in which the DRY input sends to an Aux track with the Altiverb 7 plug-in inserted and Altiverb 7 has loaded the IR of the same EMT 250 setting.

The SST-282 audio examples are recordings of the DRY input track played through the actual SST-282 Space Delay in Stanley Arts' studio at the actual IR recording session.
The ALTIVERB examples are bounced tracks from a Reaper session in which the DRY input has the Altiverb 7 plug-in inserted on its track and this Altiverb 7 has loaded the IR of the same SST-282 setting. A stretch of SST-282 DA converter noise was mixed into the Altiverb mock up to make the comparison fair.
For the joy of listening to a nice piece of music, both examples have the same amount of DRY input mixed to it. The guitar example is a snippet from Kiss Landing by Pierre Bensusan.

In all examples there was no damping applied in the 240 unit. Martyn's setting is his preferred one: the -24dB Low cut on the 240 and a personal EQ setting to boost treble. The other two examples are the -24dB low cut and no low cut. All 240 audio examples are recordings of the DRY input track played through the actual 240 Gold Plate in Martyn Heyne's Studio in Berlin at the IR recording session.
The ALTIVERB examples are bounced tracks from a Pro Tools session in which the same DRY input has the Altiverb 7 plug-in inserted on its track and this Altiverb 7 has loaded the IR of the same 240 setting.
A close listen will reveal that the IR in Altiverb lacks the noise the real 240 reference recording has.
The guitar example is a snippet from Kiss Landing by Pierre Bensusan.

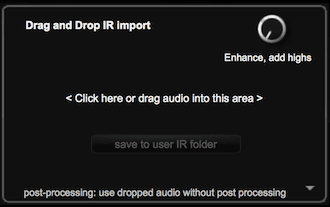
With the sweeps and tool you get with Altiverb 8 you can capture acoustics yourself and use these impulse responses in Altiverb. Please check the tutorial video and follow the tips to get best results.
Watch the video Follow the tips, get startedIf you have any questions or need assistance in this process: contact support@audioease.com.
Impulse Repsonses made like this, with the Altiverb sweeps and the tool that comes with Altiverb, may only be used in Altiverb. These IRs are saved in Altiverb Proprietary format. Reverse engineering or re-sampling is prohibited. This information is also in the End User License Agreement of Altiverb.
The most used, general purpose, sweep file:
30s sweep for 16sec reverb 48k.wav
In total it takes about 1 minute to get 16 seconds of reverb.
On a busy film set when people are waiting, time is limited. When you do not have the time to use an entire minute per take use one of shorter sweeps below. Do select the proper sweep for the length of the reverb you wish to sample.
10s sweep for 3s reverb 48k.wav| 10s sweep for 3s reverb | 44.1k | 48k | 88.2k | 96k |
| 10s sweep for 15s reverb | 44.1k | 48k | 88.2k | 96k |
| 30s sweep for 3s reverb | 44.1k | 48k | 88.2k | 96k |
| 30s sweep for 16s reverb | 44.1k | 48k | 88.2k | 96k |
| 30s sweep for 45s reverb | 44.1k | 48k | 88.2k | 96k |
| 100s sweep for 16s reverb | 44.1k | 48k | 88.2k | 96k |
| 100s sweep for 45s reverb | 44.1k | 48k | 88.2k | 96k |
| 100s sweep for 180s reverb | 44.1k | 48k | 88.2k | 96k |
| 300s sweep for 45s reverb | 44.1k | 48k | 88.2k | 96k |
Spring reverbs, echo chambers, plate reverbs and other analog reverbs: please use the sweep files mentioned above.
For digitally connected reverb gear: use the spike file below. It is prefered over sweeps when capturing time variant features like chorus.
In this deep dive video Arjen shows you how to capture concert hall IRs with stereo input and up to atmos 9.0.6 output using only one speaker and two microphones.
You will learn how to set this up, process this and why we recommend to do it like this.

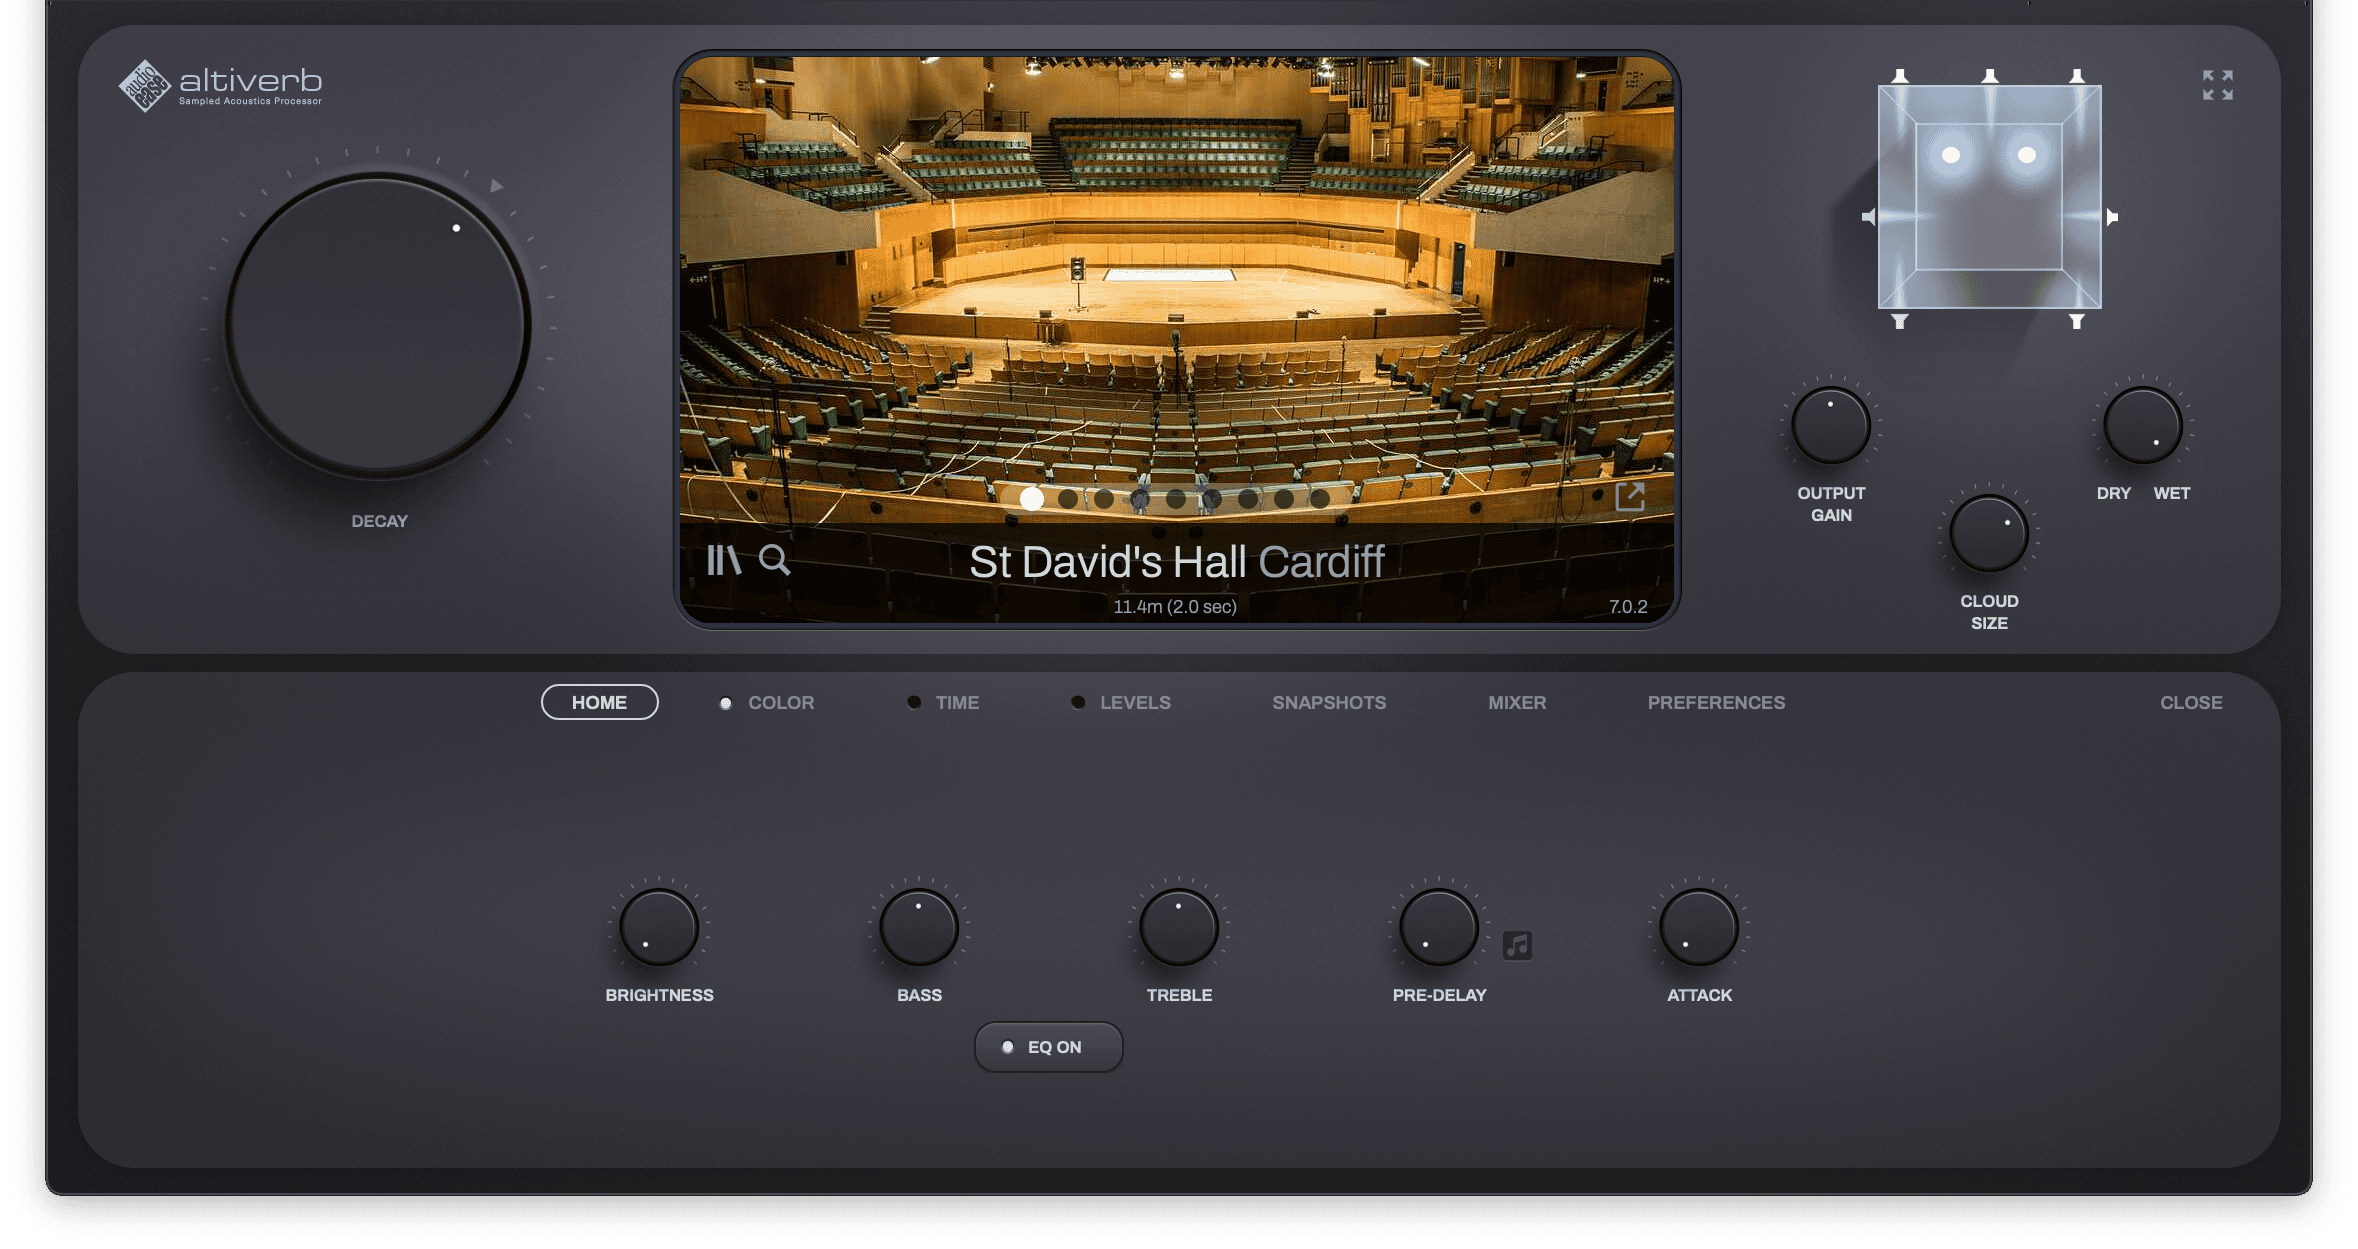
Apart from the extensive library of impulse responses you get with this plug-in, Altiverb features some clever controls for shaping the sound of this convolution reverb.

This essential reverb parameter is very prominent in Altiverb 8. You can apply an exponential decay on any impulse response to reduce the reverb time, without changing the character of the room. Read more...
Over the years we have recorded in multiple rooms that allow physical reverb time control by introducing objects that dampen the room, like curtains for instance. For many rooms we sampled both wet (no damping) and the more intimate (dry) settings and added both to Altiverb. When you compare a wet setting with the right amount of reverb time reduction you will hear you get very close to the original in dry (dampened) conditions recorded impulse response. This shows how natural this control behaves.

Real spaces often contain less high frequency content than algorithmic (synthetic) reverbs. Sometimes you need that extra sparkling brightness in a reverb tail that is just hard to obtain from the real world. Read more...
And often this cannot be achieved with EQ, because what’s not in the signal cannot be turned up with EQ either.
This is where brightness comes in.
Brightness adds an entire algorithmic synthetic reverb on top of the real-world impulse response. It tailors the reverb tail exactly to match the IR, following length, slope and early reflections closely, so that it connects and the result does not fall apart in two sounds. By turning up brightness you dial in more of the synthetic reverb and thus more high frequencies.

Control the reverb length of three separate and adjustable frequency bands. Shortening is damping, lengthening is enhancing. You can see the effect of damping in the waterfall graph of the impulse response.

Altiverb can have mono or stereo inputs. When making impulse responses, we used either one speaker position in the center of the stage for mono input, or two speaker positions for stereo input. So there is a direct relation between the amount of inputs and the speakers used. Using the positioner tab, available only in mono and stereo input Altiverbs, you can switch on the speaker, in which case you can hear where it stands. You can also, right there, move the speaker around.
This is the absolute most realistic sounding virtual playback of your audio in any space in Altiverb.
You should use it fully wet, but even then you hear quite some dry-ish material, because there is a direct path from speakers to microphones. A demo of this is in the first minutes of the Altiverb 8 guided tour video.
The four knobs on the right manipulate the different stages of the impulse response, starting with the earliest part: the direct sound. The gain and color of the direct sound can be adjusted. Color is adjusted between neutral (flat) and the actual direct sound that is in the Impulse Response (IR), which sounds more realistic, but can give unwanted coloration as it can contain a very early reflection from an on stage piano or the stage itself, and also includes speaker and microphone coloration.
Early and tail can be switched on or off and the levels can be changed too. Read more...

An exhaustive recording session in a Viennese concert hall gave us an algorithm that allows you to accurately place your sound anywhere on stage of all our concert halls, or in any of our other rooms. Physically correct sound placement using the Altiverb Stage Positioner creates a stunningly realistic audio panorama.
Back in December 2003 Audio Ease went to several rooms to make samples using a larger than usual set of source positions, one position after another. We made a photo of each position, and composited them into a single picture. The goal was to find out what exactly the influence of stage position is on the impulse response, so an algorithm could be derived that allows the source sound to be moved around on the stage of any hall or room available in Altiverb. The following is a demo using Altiverb's resulting 'stage positions' feature for a specific case:
Creation of a convincing stereo image of a sampled orchestra on a stage


The percussion section is placed in three different positions on stage in the same hall (Konzerthaus, grosse saal). The image is the starting position, but then the percussion moves to the rear and then the right rear. There are two speakers on stage because the input audio is a stereo mixdown of a percussion section.
We asked Maarten Spruijt, composer, maker of primary demos for such renowned sample manufacturers as Vienna Symphonic Library, Spectrasonics and ProjectSAM, to compose a short movement for us. As his instrument he chose to use the Vienna Symphony Library of orchestral samples.
This is what his dry, un-positioned orchestra sounded like.
We asked Maarten to distribute his separate instrument tracks over the stage using Altiverb's stage position feature. Each track was to be played back from a different position on stage.
First thing to do was insert Altiverb on each of the 15 instrument tracks. Each Altiverb loaded with the same microphone setup. A setup close to a stage was used to achieve a wide stereo image:

To ease the load on the CPU, and to remain more flexible, the choice was made to not render the full tail in all instrument tracks. Instead all 15 Altiverb instances in the instrument tracks only use the direct sound and the early refs (reflections).

On the master track, one Altiverb will take take care of the tail. This way the longest part over the reverb is applied once instead of 15 times and by using this setup you can easily change the tail sound.
Then the Altiverbs were switched to their Stage positions tabs. The direct gain control now becomes disabled, as the Stage positions control takes over the gain of the direct sound.
Stage positions were selected, by dragging the speaker for mono instrument tracks, or by dragging both speakers for placement of stereo mixdowns of instrument groups.
Classic orchestral positions were selected, with percussion in the far back of the stage.
Maarten's positionings are available as Altiverb plug-in presets here:
Orchestral positioning presets
With all of the instruments placed properly a final Altiverb was put in the master channel to take care of the reverb tail. Mechanics Hall in Worcester MA was selected to provide the reverb tail. The instrument tracks now provided the direct sound and early refs in the production, so the direct sound of the master Altiverb was set all the way down, as well as some of its early reflections (early).

With the master now only rendering the tail, the mix between the placement and the tail could be made using the wet/dry control of the master Altiverb.
Check out this final result. A very convincing orchestral stage, that could not have been achieved using traditional panning.
The audio demos on this page are optimized for playback on speakers, not headphones.
Alternatively, here's a wetter setup, that makes use of the Amsterdam Concertgebouw for the reverb tail.(Maartens alternatives are available in the preset menu under Orchestral Reverb Tails)
You can download all audio featured on this page also as non-compressed 44.1 kHz, 16 bits AIFF files.
download all demo audio
Altiverb features a four band equalizer. The bass and treble bands are Baxandall EQs, designed to not shift phase more than 180 degrees, which effectively means that combing or cancellation effects are unlikely when the EQ’d signal is mixed with the dry signal. The equalizer works on the wet signal only.

Makes the selected room (impulse response) smaller or larger. This transposes room modes and resonances, tightens or spreads early reflections, and shortens or lengthens the reverb tail.

Delays the onset of the reverb. If the note symbol is clicked, the timing of the delay is locked to the tempo of the host application so you can select an eighth-note as the delay time.

Altiverb XL supports more than two inputs. With more then two inputs there is no longer a direct relation between an input and a speaker that was used when making the impulse response. Therefore the Positioner tab is unavailable. Instead there is a new control: cloud size. With cloud size turned down, the reverb no longer outputs to all output channels, it starts clustering around the input pan position of your sounds. Even when the input sound moves, the reverb cloud travels along with it. The Altiverb 8 guided tour video gives an example of input pan following reverb starting at 5:43.
Fades-in the start of the impulse response, resulting in a more lush, distant reverb sound.

The entire impulse response is reversed in time for backward reverb effects.

This effect does not emulate anything that happens in reality, it emulates something that happens in artificial reverb algorithms. Read more...
When the impulse response is modulated, the frequencies of input notes are a little bit spread out. The effect is that a note that is a bit off-key (false) does not necessarily remain false in the reverb, or that the reverb may sound a bit more full, or that a snare sample that is input twice to Altiverb does not come out of Altiverb the same way twice.

Allows you to abruptly cut-off a reverb after a set amount of time. The gate time can also be locked to the tempo of the host application.

Everything is recorded with enough microphones to provide Atmos reverb (up to nine eye level speakers plus six over head channels).
There's a new output meter and a mixer that provides full control of all outputs.

Snapshots are presets that are private to an instance of Altiverb. Read more...
Another Altiverb in the same session contains different snapshots. Snapshots are saved in the session/project. Snapshots can be switched using automation. The automation preset index parameter does that. Snapshots are an inheritance of older versions of Altiverb and no longer a necessity in Altiverb 8 because Altiverb 8 is a total-recall plug-in, meaning that the entire state of the plug-in can be automated without the use of snapshots.

M1 / M2 & Intel macs are fully supported.

Up to 9.1.6 input and output channels for fully immersive convolution reverb. XL only

(except AU version)

Automatic input-pan following reverb, locate each reverb around the panning of the source, even when multiple sources move in a single instance.

IR switches, reverb adjustments and stage position changes all practically seemless without any clicks.
These allow manipulation of level and delay per output channel. XL only

Almost all of the hundreds of the music spaces (concert halls, churches, cathedrals, studios, scoring stages) have been upgraded to Dolby Atmos by utilizing the original extra recordings we have been routinely making throughout the years.
All outputs of Altiverb are always real and distinct original speaker to microphone takes.XL only

Across surround busses up to Dolby Atmos (9.1.6), making multi-mono instances unnecessary, reducing session load time considerably. XL only

The newly designed browser offers more and quicker ways to find the right IR.

This tool enables you to create your own IRs, with output support up to 9.1.6 channels.
macOS only Please note the IRTool app is currently not available on Windows.

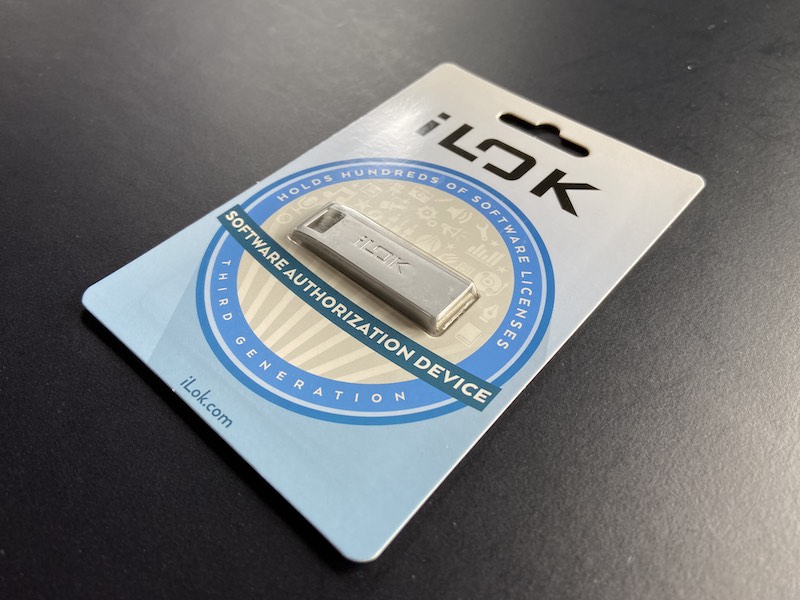
The Altiverb license can be activated on a computer or on a USB iLok key. The iLok USB key is NO LONGER required.

To ensure compatibility with worldclass VST host applications (DAWs) like Ableton Live, Cubase and Nuendo Altiverb 8 features a VST3 plug-in.

Almost all IRs have been supplied with a real center channel for LCR or 5.0 7.0 without center bleed.

Altiverb 8 is fully backward compatible replacing Altiverb 7 in your sessions.
In some DAWs this might not work automatically read more here

many new spaces are included with Altiverb 8, like the Zuidervermaning from the intro video, a dance club, some industrial spaces, a Tesla, camper vans , atmos plates and springs reverbs, and a selection of buckets and bins including a porta toilet. All including atmos.

Your sessions with many Altiverbs will load quicker than ever.
Wait? What?
This is what Altiverb 8 continues to deliver, just like Altiverb 7 (and earlier) has been delivering for two decades:
iLok account
The Altiverb 8 license can be activated by iLok on your machine (computer) or on an iLok USB Key (generation 2 or newer).
The physical iLok USB key is NOT required.
iLok Cloud is not supported.
macOS
Mac OS X 10.14 (Mojave) or higher
macOS 26 (Tahoe), macOS 15 (Sequoia) and macOS 14 (Sonoma) are fully supported.
Windows
Windows 10, Windows 11
8 GB free disk space
The core IR set takes around 8 GB of hard disk space. You can choose to install this in any location you like.
AAX Native
Audio Unit (AU, macOS only)
VST3
MAS
AU is now recommended for use in Digital Performer (DP).
Check this FAQ entry for more details.
Altiverb 8 Regular
supports mono and stereo inputs and outputs.
supports sampling rates up to (and including) 96 kHz.
Altiverb 8 XL
supports inputs and outputs from mono all the way up to 9.1.6.
supports sampling rates up to 384 kHz.
Altiverb 8 XL and Regular feature the same controls, the same impulse responses. Sessions made with Regular can be opened with XL (and the other way around), as long as the session is within the Regular limits (stereo & max 96kHz).
You can always upgrade from Regular to XL for the price difference between the two.
 ⭐️ classic level meters in the mixer tab
 ⭐️ import and export of single presets or entire snapshot banks
 ⭐️ new IR downloads from within the browser window
Altiverb is a music and post reverb. The 5.0-in 5.0-out Altiverb, however is mainly targeting post. The 5.0-in 5.0-out Altiverb 8 loads new true 5.0 IRs by default, implements easy center-channel-only reverb with input pan following and adjustable cloud size. For Post this instance has undergone massive improvements and it was the most challenging to keep it backward compatible.
In a 5.0 input to 5.0 output instance of Altiverb 7 a stereo to quad output IR was loaded by default, mainly because no 5.0 IRs existed in Altiverb 7. Center reverb was created via the center bleed option, a delayed mix of the rear channels in the front. Altiverb 8 will load the IR that was chosen in Altiverb 7, including the center bleed. You may, as we do, prefer the native Altiverb 8 way: if you have just upgraded to v8 when opening your Altiverb 7 project or template we advise you to open your Altiverb 5.0 input to 5.0 output instances and load the true 5.0 Impulse Response in there. One should be available for most Impulse Responses in the Altiverb collection.
When cloud size is increased it gradually adds speakers which increases the total level. Cloud size did not exist in Altiverb 7. In Altiverb 8 5.0 input to 5.0 output Altiverb 7 settings are loaded with 60% cloud size, which may result in a higher output level than in Altiverb 7 produced, depending on different circumstances.
Similar measures have been taken in the quad input quad output and the 5.1 input 5.1 output instances. Please note that all of the above only applies to Altiverb 7 settings received by Altiverb 8.
With the Stage Positioning turned On the Center channel now better equals Left and Right channels in a number of rooms.
We use widely spaced omnidirectional microphone setups to capture the IR. Left and right microphones are typically spaced by more than 3 meters. For Altiverb 8 we needed to select a center output to the front L and R microphones in every room. We originally decided to use a front row center microphone for that. However, that microphone faces the center stage speaker on-axis so it is brighter, and its path is shorter so it is louder. This can be tolerated to a peak level difference of 4dB between center and left output. However as was pointed out to us by score mixers and upon careful review, we have, in a number of rooms, now decided to use the second row center microphone as the front row center output. This results in an improvement of the balance of the collection. There are no new Impulse Response names, so no automation breaks. There are differences but they are usually slight. If you have been using the center channel in Altiverb 8 in one of the rooms below, you may hear a difference.
A list of rooms with an adapted center channel:
In POST:

Black Hangar
Castle of Zuylen attic
Castle of Zuylen gallery 1st floor
Castle of Zuylen kitchen
Castle of Zuylen library room
Studio 2 control room
Picasson Hall far
Ford Transit van
Gasometer - Westergasfabriek Amsterdam
Kitchen 4
Therapist's 2
Warehouse Las Palmas main space
Warehouse Las Palmas main space between stands

IN MUSIC:

Allaire Studio Neve room
Allaire Studio sunporch
Amaryllis Fleming Hall
Antwerp Sports Stadium
Berliner Konzerthaus large hall
Berliner Konzerthaus small hall
Berliner Philharmonie large hall
Hansa studios big hall - meistersaal
Broadcast studio mco 1 orchestral
Broadcast studio mco 3 Metropole
Broadcast studio mco 4 choir
Broadcast studio mco 5 orchestral
Chapelle Saint Jean Baptiste
Clinton Recording - Manhattan NY
Clubhouse - Rhinebeck NY
Dark Horse cabin drum room, Nashville
De Doelen
Dukes Hall
Ferber studio A - Paris
Festspielhaus - Baden Baden
Filmorchester Berlin studio 2
Gol Gumbaz ground level
Gol Gumbaz the whispering gallery
Gol Stave Wood Chapel
Halle Aux Grains - Toulouse
Hardenbergstrasse Berlin
Harpa Eldborg - Reykjavik
Haydn Hall - Esterhazy Austria
Iglesia de San Miguel - Cuenca
Joseph Joachim Hall
Kings College Chapel - London
Konserthuset Large Hall - Stockholm
Konzerthaus Vienna large hall
Lully Hall Ghent
Mechanics Hall - Worcester USA
Mozart Hall
Muziekgebouw aan het IJ, Amsterdam
Opera of Ghent
Paramount Stage M
Salle de Musique - Chaux de Fonds
Sodra Teatern - Stockholm
Sound Kitchen the big boy- Nashville
St Alain de Lavaur
Teldex Studio Berlin
Theatre du Capitole - Toulouse
Trackdown Scoring Stage
Tracking room - big live room
Train station waiting room class 1-2
Uranienborg Church - Oslo
Utrecht Conservatory Chapel
Vigeland Mausoleum - Oslo
Vredenburg Leidsche Rijn
Wooden Church - Zuidervermaning
Wooden Church Krommenie Vermaning
Zlin
Check the frequently asked questions below or send us an email and we will get back to you as soon as possible!
+31 30 244 6335
| AAX: | /Library/Application Support/Avid/Audio/Plug-Ins/ |
| AU: | /Library/Audio/Plug-Ins/Components/ |
| VST3: | /Library/Audio/Plug-Ins/VST3/ |
/Library/ScreenSavers/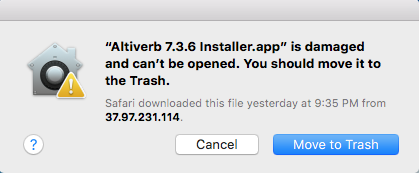
| AAX: | /Library/Application Support/Avid/Audio/Plug-Ins/ |
| AU: | /Library/Audio/Plug-Ins/Components/ |
| VST: | /Library/Audio/Plug-Ins/VST/ |


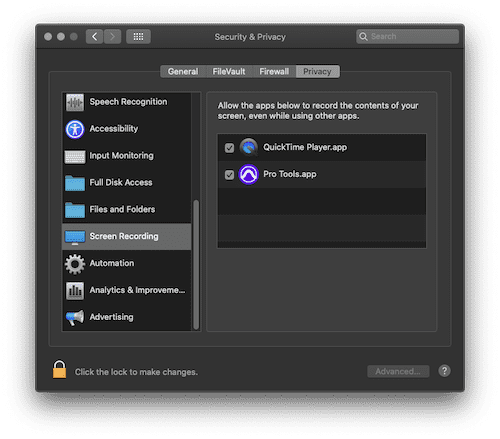
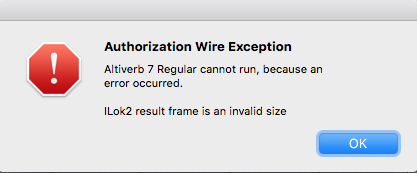 "Speakerphone / Altiverb cannot run, because an error occurred. Encrypted Channel Bad Channel ID (or USB error or frame is an invalid size)"
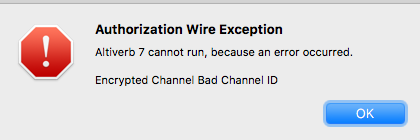
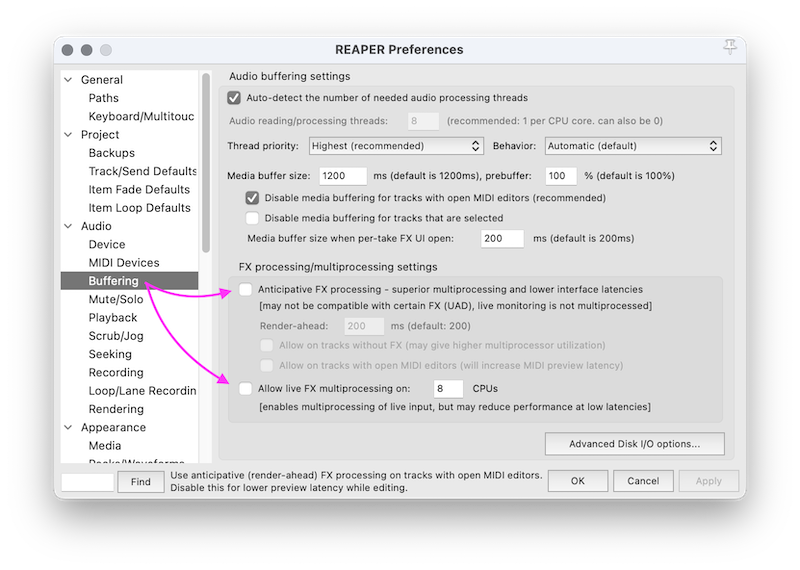 1. Audio -> Buffering


While Altiverb 8 is backwards compatible with Altiverb 7 there are some big changes in the multichannel Altiverb 8 implementation that changes the output of the 5.x channel plug-in specifically.
There are three types of '5.x' Altiverb instances in use:
Type 1: the fivefold multi-mono type. Altiverb 8 sounds identical to Altiverb 7 in this one.
Type 2: Mono or stereo input to 5.x out: this instance is 3dB louder than Altiverb 7, and otherwise identical. We can no longer fix this without breaking more sessions than it fixes. A -3dB Trim after your Altiverb 8 will fix this.
Type 3: The 5.x in 5.x out version of Altiverb 8 does not sound the same as Altiverb 7.
It sounds similar at cloud-size maximum (loading the old quad IR with center beed and all), but the level does not match. A fundamental internal routing change that allows for the new cloud-size feature breaks this backward compatibility.
Only Type 3 is trouble when migrating from v7 to v8.
If you need to pick up an Altiverb 7 session with (type 3) 5.0 to 5.0 output reverbs then use Altiverb 7 to be safe (if on silicon, with pro tools in rosetta mode). A v7 license will be supplied if you ask for it. If you want to move forward and use Altiverb 8 anyway, check the level of the reverb and adjust it.
While you are at it, it is best to change the chosen IR to one that is true 5.0, rather than load the old Altiverb 7 quad-with-center-bleed type.
The full note from the 8.0.7 update
note 1:
Levels are improved in Backward compatibility situations for the Altiverb 7 instances with input-output: quad to quad, 5.0 to 5.0 and 5.1 to 5.1.
Altiverb is a music and post reverb. The 5.0-in 5.0-out Altiverb, however is mainly targeting post. The 5.0-in 5.0-out Altiverb 8 loads new true 5.0 IRs by default, implements easy center-channel-only reverb with input pan following and adjustable cloud size. For Post this instance has undergone massive improvements and it was the most challenging to keep it backward compatible.
In a 5.0 input to 5.0 output instance of Altiverb 7 a stereo to quad output IR was loaded by default, mainly because no 5.0 IRs existed in Altiverb 7. Center reverb was created via the center bleed option, a delayed mix of the rear channels in the front. Altiverb 8 will load the IR that was chosen in Altiverb 7, including the center bleed. You may, as we do, prefer the native Altiverb 8 way: if you have just upgraded to v8 when opening your Altiverb 7 project or template we advise you to open your Altiverb 5.0 input to 5.0 output instances and load the true 5.0 Impulse Response in there. One should be available for most Impulse Responses in the Altiverb collection.
When cloud size is increased it gradually adds speakers which increases the total level. Cloud size did not exist in Altiverb 7. In Altiverb 8 5.0 input to 5.0 output Altiverb 7 settings are loaded with 60% cloud size, which may result in a higher output level than in Altiverb 7 produced, depending on different circumstances.
Similar measures have been taken in the quad input quad output and the 5.1 input 5.1 output instances. Please note that all of the above only applies to Altiverb 7 settings received by Altiverb 8.


/Library/ScreenSavers/